


Last December, I attempted Christmas nails three times and failed spectacularly each time. My red polish chipped within hours, my glitter application looked like a craft explosion, and don’t even get me started on my attempt at snowflakes. I finally figured out the method that works, and now my holiday manicures last the entire season.
This tutorial takes about 90 minutes start to finish, but the results are worth every minute. I’ve refined this process over multiple holiday seasons, and it consistently gives me that professional salon look at home.
What You’ll Need
Here’s everything I keep in my Christmas nail kit. Don’t skip the prep items — they’re what separate amateur attempts from professional results.
- Nail file (180/240 grit works perfectly)
- Cuticle pusher and nippers
- Rubbing alcohol or nail dehydrator
- Quality base coat (I swear by gel formula)
- Deep red or forest green polish (your festive base)
- White polish for snowflakes or accents
- Gold or silver metallic polish
- Fine detail brush (size 0 or 00)
- Dotting tools in various sizes
- Small piece of makeup sponge
- High-quality topcoat
- Cleanup brush
- Acetone for corrections
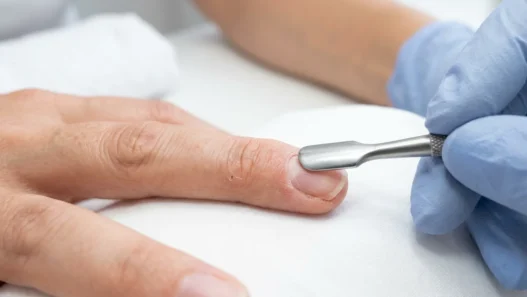
Step 1: Prep Your Natural Nails
This step makes or breaks your entire manicure. I learned this the hard way when my first Christmas nails peeled off on December 26th. Start with completely clean, dry nails — no oils, no old polish residue, nothing.
File your nails into your preferred shape. I go for a rounded square because it’s festive but practical for the holidays. Push back your cuticles gently, then trim any hangnails with sharp nippers. The goal is a smooth, even nail bed.
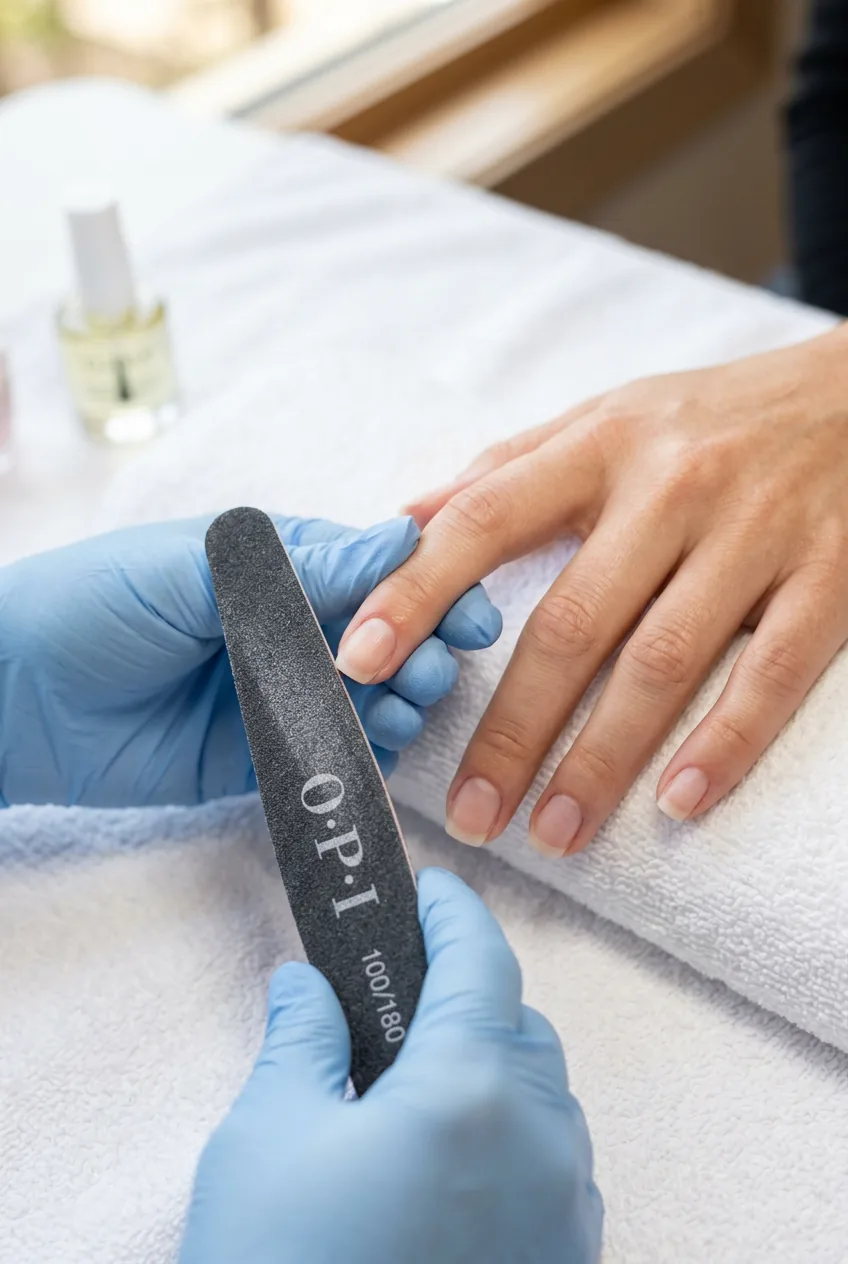
Once shaped, swipe each nail with rubbing alcohol. This removes natural oils that prevent polish adhesion. Let them air dry completely — rushing this step is where most people mess up.
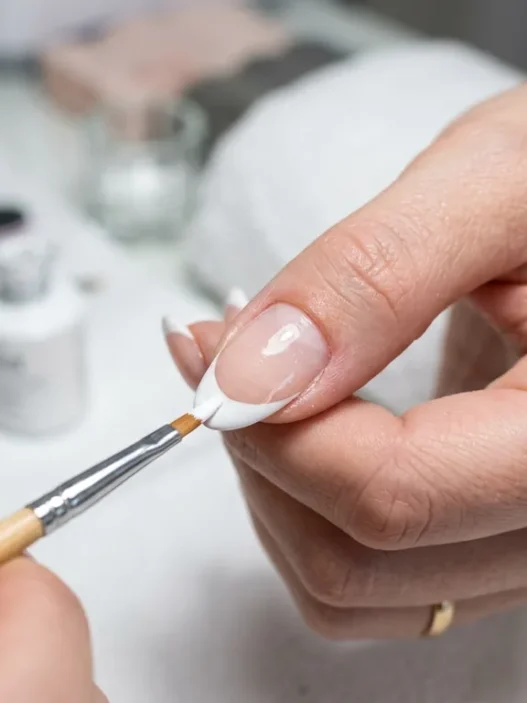
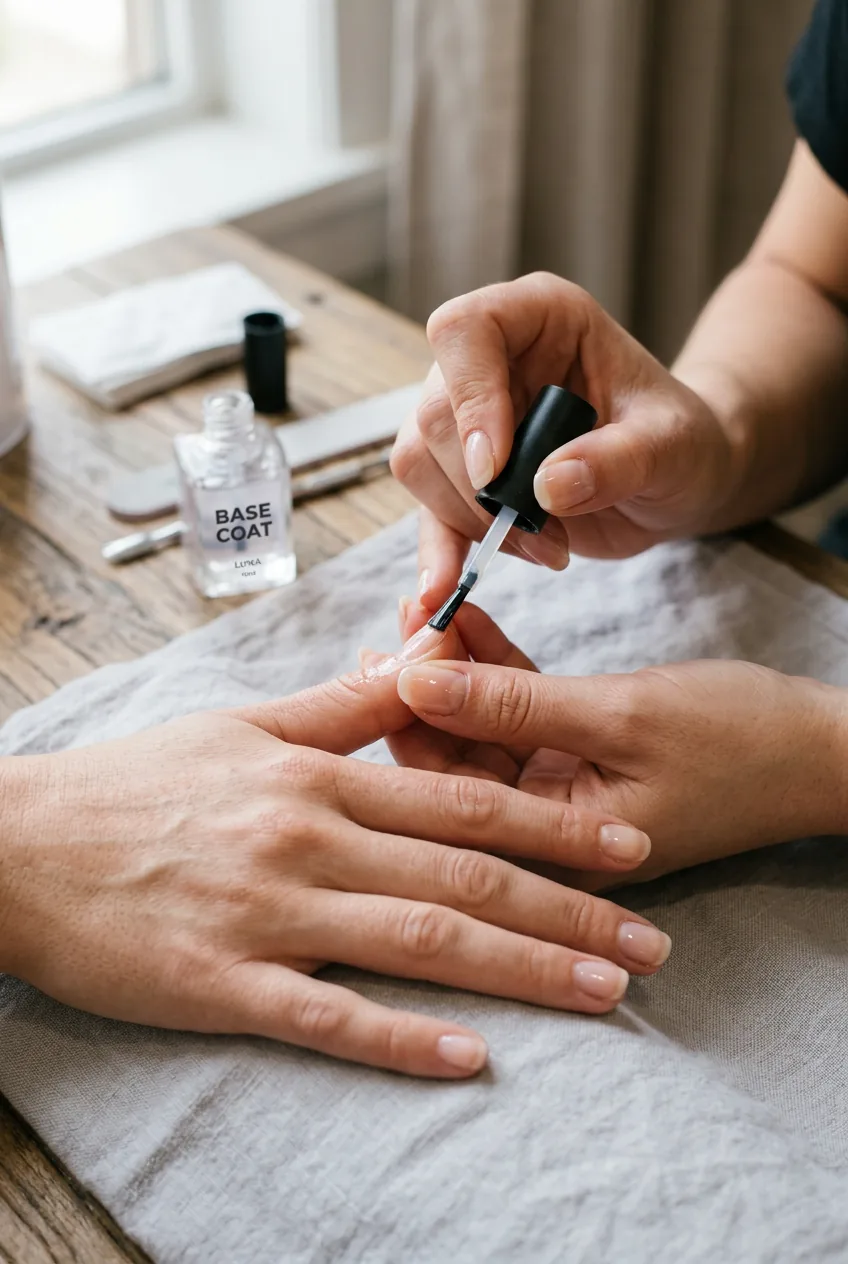
Step 2: Apply Your Base Layer
Your base coat is your foundation. I use thin, even strokes down the center of each nail, then fill in the sides. Don’t flood the cuticles — leave a tiny gap around the edges.
The trick I’ve learned is to cap the free edge (brush across the nail tip) with base coat. This prevents chipping and gives you that professional finish. Let this cure completely if you’re using gel, or wait 2-3 minutes for regular polish.
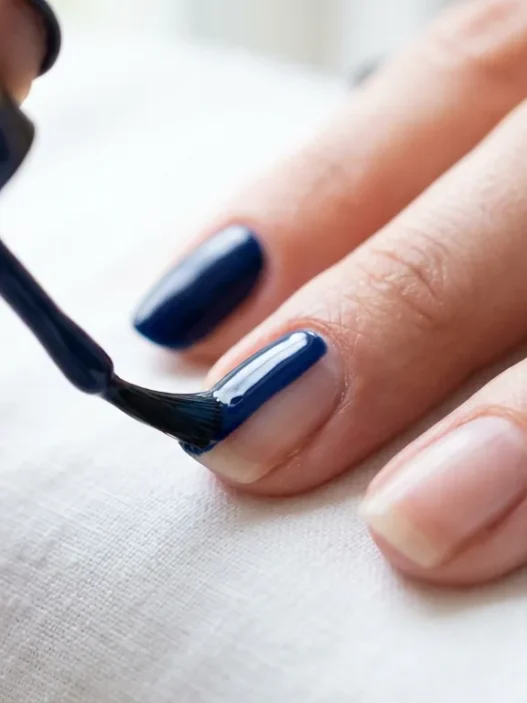
Step 3: Create the Festive Base Color
This is where your Christmas magic starts. I typically alternate between deep burgundy and forest green, but classic red never fails. Apply your first coat in thin layers — better to do three thin coats than two thick ones.
Wait between coats. I know it’s tempting to rush, but patience here pays off in longevity. For the second coat, use the same technique but ensure complete coverage. You want rich, saturated color that screams holidays.
I used to apply polish too thick in my early attempts, thinking it would be more opaque. Instead, I got bubbles and uneven texture that looked amateur. Thin layers are always the answer.
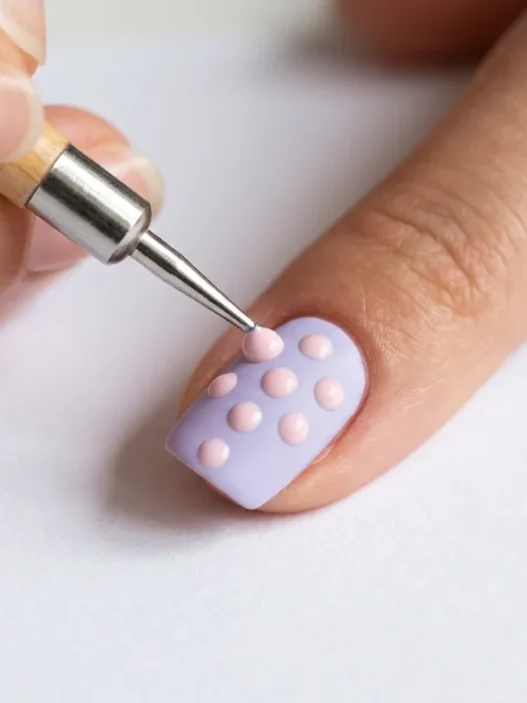
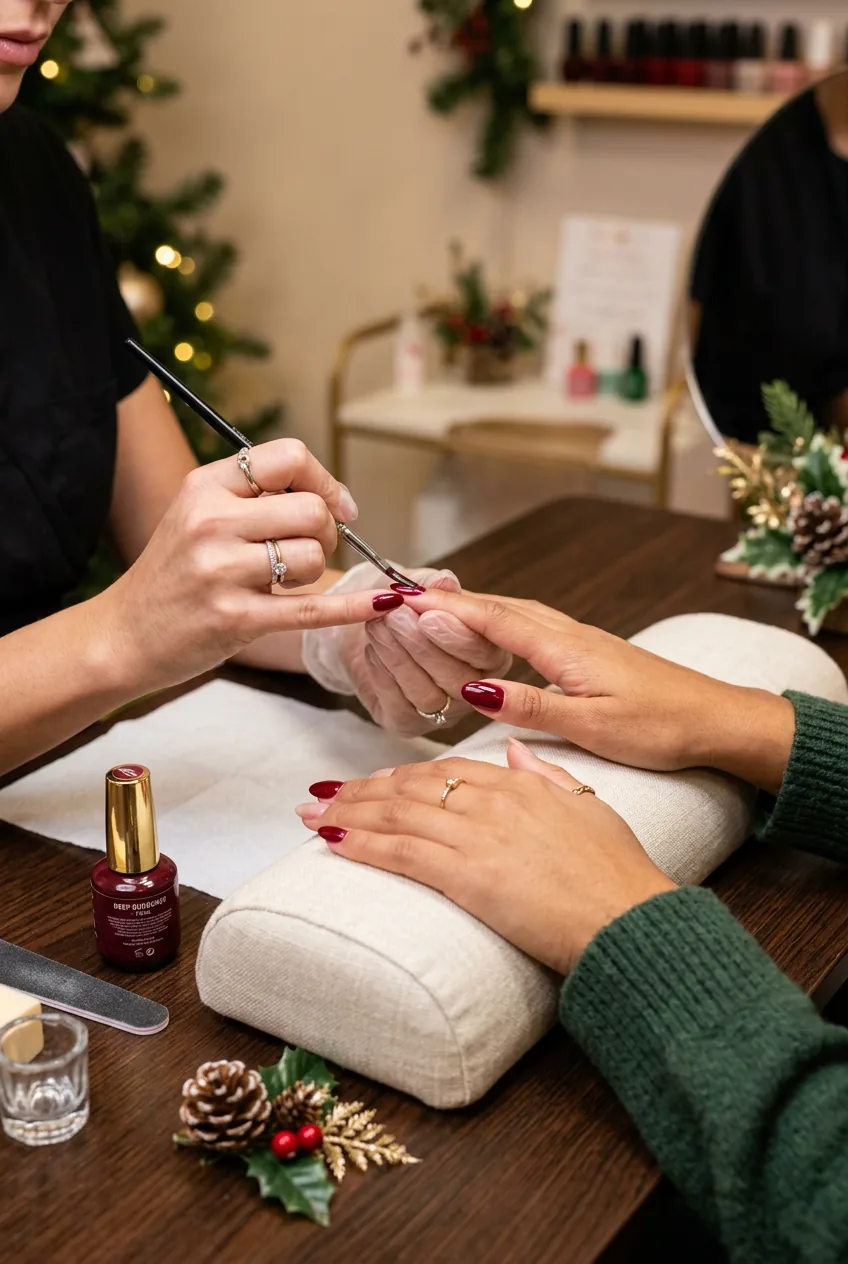
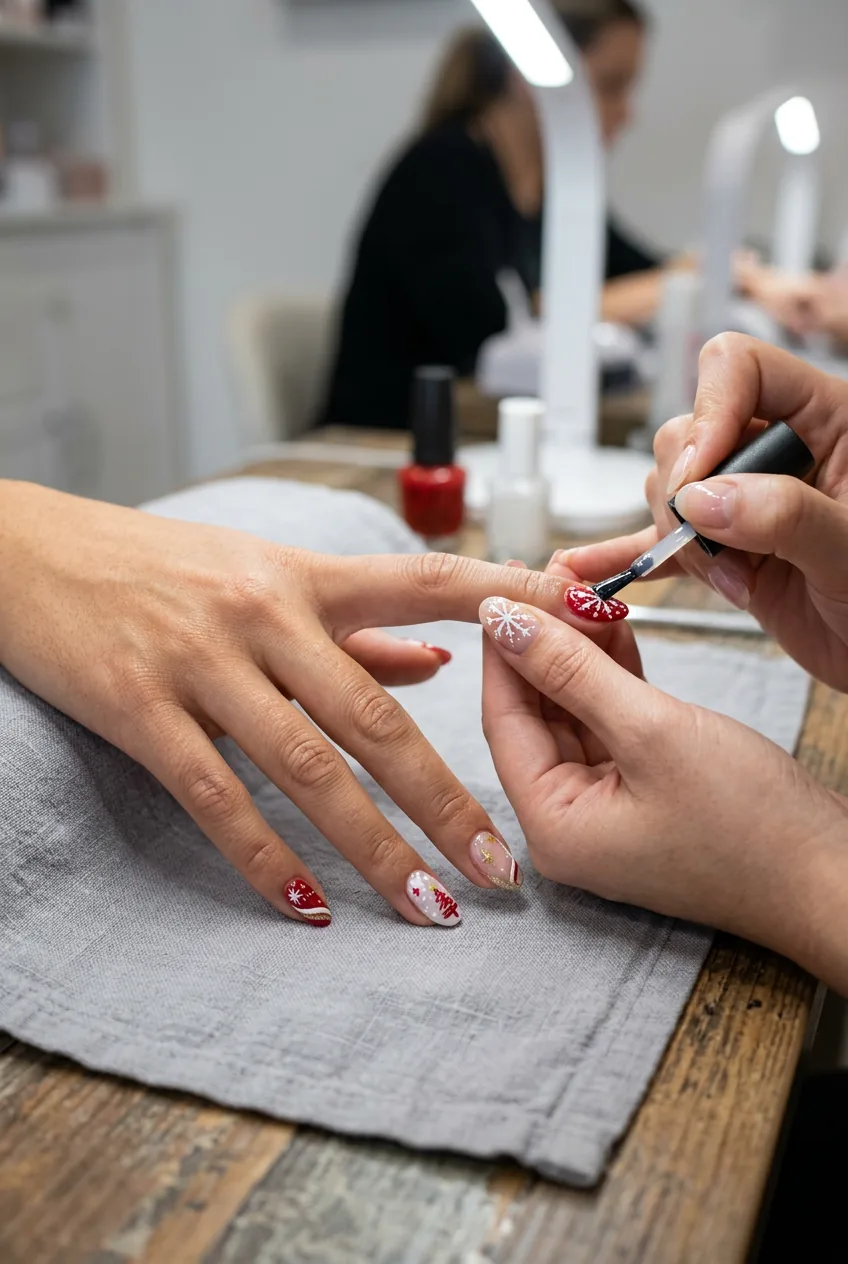
Step 4: Add Holiday Accent Details
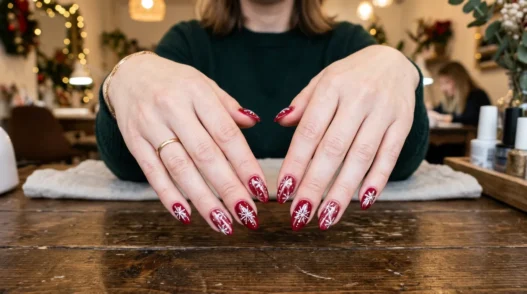
Now for the fun part — your festive accents. I like to do accent nails on my ring fingers and thumbs. For snowflakes, use your detail brush with white polish to create delicate six-pointed designs. Start with a vertical line, add a horizontal line, then diagonal lines to complete the snowflake.
For metallic accents, I use the sponge technique. Dab a small amount of gold polish onto the sponge, then gently press it onto the nail for a subtle glitter gradient. This works beautifully over dark base colors.

Holly leaves are another favorite — use your detail brush to paint three small oval shapes connected at the base, then add tiny red dots for berries using your smallest dotting tool.
See the Snowflake Technique in Action
Step 5: Apply Topcoat for Durability
This step is crucial for seasonal trends that need to last through holiday parties and gift wrapping. Apply topcoat in the same thin, even strokes as your base coat. Make sure to cap the free edges again.
I prefer a high-gloss finish for Christmas nails because it makes the colors pop under party lights. The topcoat also seals in your accent work and prevents smudging of delicate details like snowflakes.
Step 6: Clean Up and Perfect
Even with careful application, you’ll have some cleanup to do. Dip your cleanup brush in acetone and carefully remove any polish that got on your skin or cuticles. Work slowly — acetone can remove your design if you’re not careful.
Check each nail for imperfections. Small smudges can be fixed with your detail brush and matching polish. For larger mistakes, it’s better to remove that nail’s polish completely and start over on just that one.

Professional cleanup methods make all the difference in achieving that salon-quality finish at home.
Step 7: Final Cure and Seal
If you’re using gel polish, this is where you cure under your LED lamp according to manufacturer instructions. For regular polish, let your nails dry completely — I usually wait at least 30 minutes before doing anything with my hands.
Apply a thin layer of cuticle oil around each nail bed. This keeps your cuticles healthy and creates a polished, professional appearance. The oil also helps prevent the skin around your nails from looking dry against your glossy manicure.

The final result should be rich, vibrant Christmas nails that complement the holiday season. These techniques from my nail journey have transformed my home manicures from disasters to showstoppers.
Quick Answers
How long do these Christmas nails typically last?
With proper prep and application, they last 7-10 days without chipping. I’ve worn this exact design through Christmas parties, gift wrapping, and holiday cooking with minimal touch-ups needed.
Can I do this design with regular polish instead of gel?
Absolutely! The technique works with both. Regular polish just requires longer drying time between steps and may need a touch-up sooner than gel polish.
What’s the best way to remove Christmas nail art?
Soak cotton pads in acetone, place on each nail, and wrap with foil for 10-15 minutes. The design should slide off easily without aggressive scraping that damages your natural nails.
Do I need special tools for the snowflake details?
A detail brush is essential for clean lines. You can substitute with a toothpick in a pinch, but quality brushes give you much better control and precision.
These Christmas nails have become my signature look every December. The compliments I get make the extra time investment completely worth it, and honestly, there’s something magical about looking down at perfectly festive nails during the holiday season.