








I have a confession: I used to walk into the salon, say “something sparkly,” and then spend the whole appointment second-guessing myself. The nail tech would hold up three different glitter polishes and I’d freeze. The problem wasn’t that I didn’t know what I wanted — it’s that I didn’t have the language for it. Glossy party glitter and a matte dusted shimmer are both technically “glitter nails,” but they feel completely different on your hands. So I started sorting my inspo saves by finish, and honestly? It changed everything. Here’s the breakdown I wish I’d had three years ago.
Your Finish Guide — Jump to What You Want
1. Glossy Designs
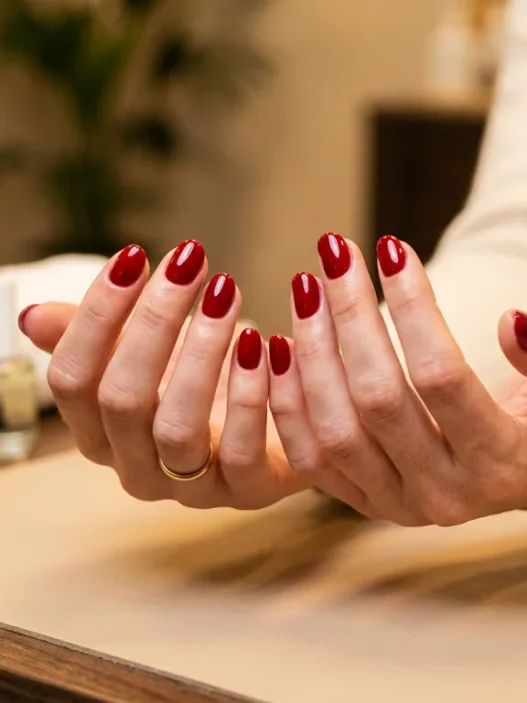
This is the classic. High-shine topcoat over glitter particles gives you that wet, dimensional look that photographs like a dream and catches light from across the room. The glitter sits under the shine rather than sitting on top of it, which means it looks almost suspended — like something frozen mid-sparkle.
Glossy glitter suits pretty much everyone, but it especially loves those who want their nails to read as polished and intentional rather than edgy. It ages beautifully too — even as the polish wears, a good gloss top coat disguises tip wear longer than matte does. If you’re booking a gel manicure, this finish is the most forgiving to maintain over two to three weeks.
How to ask your tech: “I want glitter under a high-gloss topcoat — something that looks wet and three-dimensional, not flat.” Bonus points if you bring a reference photo. Look at how she’s holding her hand in the image below — that mirror-like reflection off the tips is exactly what you’re going for.

2. Matte Designs
Matte glitter is genuinely one of the most underrated finishes out there and I will die on that hill. When you seal glitter with a matte topcoat, the sparkle doesn’t disappear — it diffuses. Instead of a mirror-sharp glint, you get a soft, almost sandy catch of light. It looks expensive in a very quiet, understated way.
This finish suits people who love texture but want their nails to feel more editorial than festive. Think fashion week rather than New Year’s Eve. It’s also incredible on darker shades — a deep burgundy with fine black glitter sealed matte looks almost suede-like. The downside is it shows oils from your skin faster, so reapplying a matte topcoat mid-week keeps things looking fresh.
For fall nails, matte glitter in rust, bronze, or forest green is an absolutely perfect call. The low shine reads as season-appropriate in a way that full-gloss sparkle sometimes doesn’t.
How to ask your tech: “I want glitter polish finished with a matte topcoat — the sparkle should look diffused, not shiny.” If they suggest a matte gel topcoat, say yes immediately.

3. Chrome and Metallic
Chrome is the finish that makes people stop you and grab your hand without asking. It’s reflective in the way a mirror is reflective — you can see actual distorted shapes in it. And when you combine chrome powder with glitter or a sparkle base, it becomes this hyper-dimensional thing that shifts color as you move.
Technically, chrome is achieved by rubbing a metallic powder over cured gel — it’s a technique more than a product, which is why it requires a skilled tech. The finish suits anyone who wants maximum drama with zero nail art detail. It’s one solid surface, but it does so much. Silver chrome is classic, but the rose gold and aurora versions are what I keep coming back to personally.
My personal pick for 2026? Aurora chrome over a sheer glitter base. The color shift goes from champagne to lilac to mint depending on the light, and I’ve genuinely never had more compliments on a set. Ask your tech to do a thin glitter gel base before the chrome powder — it adds depth that a plain chrome just doesn’t have.
You can read up on how chrome powder works before your appointment so you understand why the base color matters so much — it controls what the chrome actually reflects.
How to ask your tech: “I want chrome powder over gel — can we do a glitter base underneath first for extra depth?” If they say yes, you’ve found a good one.

A Tutorial That Shows the Layering
4. Glitter and Shimmer
Now we’re in my home turf. This is the broad category that most people think of when they hear “glitter nails” — actual visible glitter particles, chunky or fine, suspended in a clear or tinted base. But within this finish there’s a massive range, and the difference between them is worth knowing.
Fine shimmer gives you a dusted, almost lit-from-within glow. It’s subtle enough for the office and still catches candlelight at dinner. Medium glitter is your classic party nail — you can see individual particles but it doesn’t feel costume-y. Chunky glitter is full commitment festival energy, and I respect it completely.
Shimmer finishes are also the most buildable. You can layer a fine shimmer topcoat over any color for an instant upgrade — it works over nudes, over deep reds, over black. It’s also the easiest to DIY at home without professional tools, which is a genuine advantage. Some of the best nail art designs I’ve seen start with a single coat of shimmer layered over a flat base — no technique required, just product choice.
For summer, fine shimmer over a coral or peach base is everything. It catches the sunlight in the most flattering way and the look works on short, natural nails without feeling overdone. If you want more ideas for that season, there’s a whole world of summer nails inspo worth browsing.
How to ask your tech: Be specific about particle size. “Fine shimmer, barely-there sparkle” versus “I want visible glitter pieces, medium not chunky” will get you very different results. Show a photo if you can.

5. Velvet and Cat-Eye
This one is the wildcard and it earns its spot. Velvet and cat-eye finishes are magnetic gel polishes — literally. There are tiny metallic particles in the gel that you manipulate with a magnet while it’s still wet to create a streak, wave, or cat-eye shimmer effect. The result is this gorgeous directional sparkle that looks like crushed velvet or a silk ribbon depending on the angle.
It’s deeply satisfying to look at because it moves — the shimmer shifts as you tilt your hand, and no two nails look exactly the same. That slight variation is the whole point. This finish suits people who want texture and dimension without the crunchiness of actual glitter particles. It feels more grown-up somehow, more tactile.
Cat-eye gels also happen to be spectacular for winter nails — deep navy, forest green, or inky plum with a silver cat-eye streak looks genuinely stunning in low light. The effect is subtle enough to wear to work but dramatic enough to feel special.
You’ll want to know how cat-eye gel magnets work before you try to DIY this one — the magnet technique is specific and the timing matters a lot. Done wrong, the streak looks muddy rather than crisp.
How to ask your tech: “Can we do a cat-eye gel with a strong stripe? I want the directional shimmer to be really visible, not subtle.” Most techs who work with gel will have a magnet — just confirm before you book.

Questions I Get About Glitter Nails
Is glitter nail polish harder to remove than regular polish?
Regular glitter polish can be a bit stubborn — the particles grab onto the nail surface, so a standard swipe won’t cut it. Soaking a cotton pad in acetone and holding it on the nail for 30–60 seconds before wiping makes a huge difference. Gel glitter formulas need to be soaked off the same way as any gel, so there’s no extra step there.
Can I layer glitter over a regular nail polish at home?
Yes, and this is honestly one of the easiest DIY upgrades you can do. Wait until your base color is fully dry — completely dry, not just touch-dry — then apply a fine shimmer or glitter topcoat. Seal with a clear glossy topcoat and you’ve got a salon-looking result without the appointment. I do this constantly between salon visits. You can find loads of inspiration in the broader glitter topcoat guides space if you want product recommendations.
Which glitter finish lasts the longest?
Chrome and cat-eye finishes tend to last the longest because they’re fully cured gel beneath the metallic effect — there’s nothing to chip off in the traditional sense. Glitter particles in a gel base also hold extremely well. Regular polish with glitter, by contrast, can peel at the tips within a week if not sealed properly. Always cap the free edge when you apply topcoat — meaning run the brush along the very tip of the nail — and your wear time will improve noticeably.
Do certain glitter finishes suit shorter nails better?
Fine shimmer and chrome are the most flattering on short nails because they create a sense of light and depth without drawing attention to nail length. Chunky glitter can sometimes make short nails look a bit cluttered — though honestly, rules are meant to be broken and I’ve seen chunky glitter on tiny square nails that looked completely incredible. Try it before you rule it out.
Alright — that’s the whole finish map. Whether you’re heading to the salon this week or just deep in inspo mode at midnight (same), I hope this makes it easier to land exactly the look you want. Save your favorite finish, screenshot the tech tip, and go get sparkly. You deserve it.