


I spent years avoiding dotting tools because I thought they were just for beginners who couldn’t freehand. What a mistake that was. Last spring, I finally picked one up after watching my nail tech create the most perfect gradient of dots I’d ever seen. Turns out, this “basic” tool is actually a precision instrument that can create everything from simple polka dots to complex mandalas.
What Dotting Actually Is
Let me clear up the biggest misconception first. Dotting isn’t just about making polka dots. It’s a fundamental nail art technique that uses the controlled release of polish from a rounded tip to create perfect circles of any size.
The magic happens because of how the tool interacts with polish viscosity. When you dip a dotting tool into polish, the liquid clings to the metal tip in a predictable way. The larger the tip, the more polish it holds. Press it to the nail, and physics does the rest — creating a circle with edges that are naturally clean because the polish follows the curve of the tool.
But here’s where it gets interesting. You can create gradients by varying pressure. Light touches make small, translucent dots. Firm pressure creates bold, opaque circles. And if you drag slightly as you lift? You get teardrop shapes or even small hearts.
I learned this technique has roots in traditional ceramic painting, where artisans used similar tools to create decorative patterns on pottery. The nail art world adopted it sometime in the 1990s, but it really exploded on Instagram around 2018 when minimalist dot designs became huge.
The Tools Worth Buying
Not all dotting tools are created equal. I’ve tested dozens over the years, and the differences are dramatic.
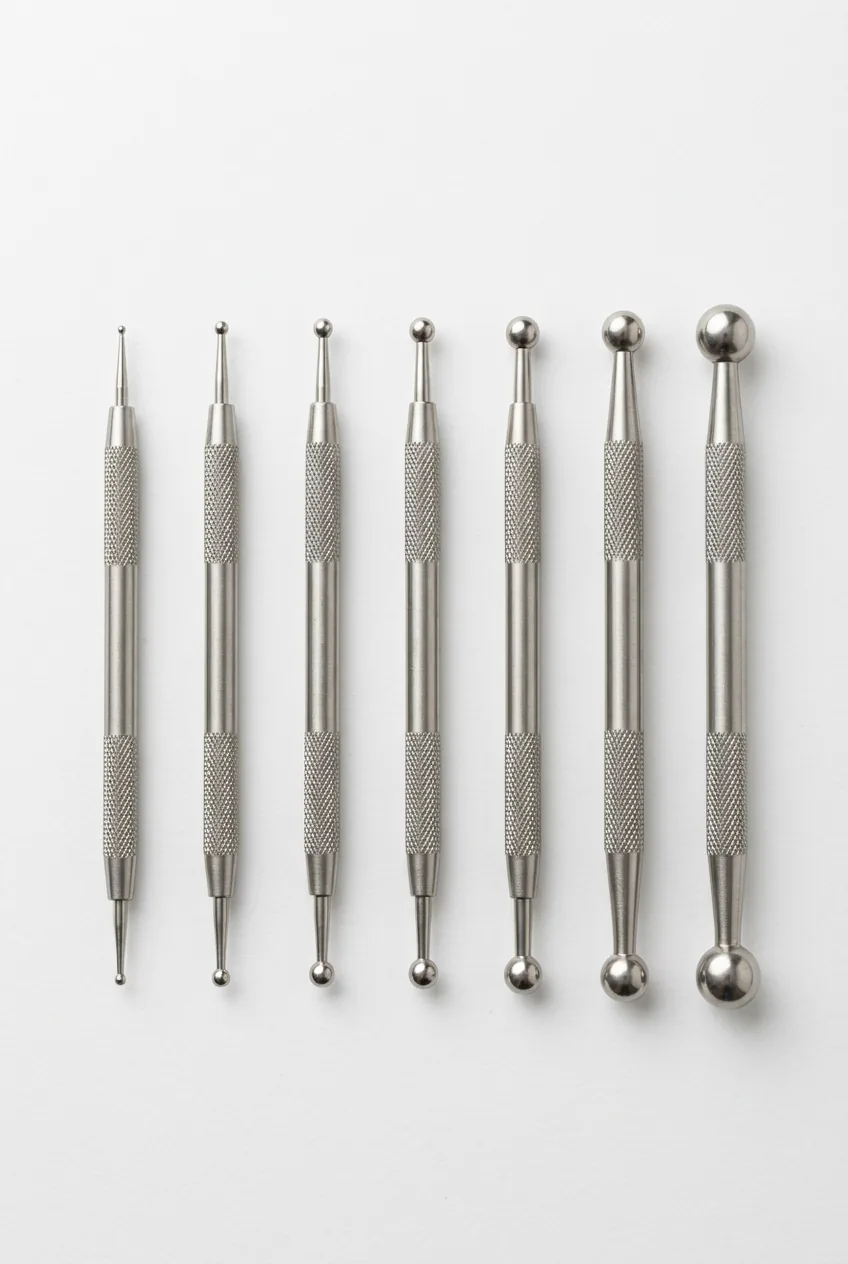
First, let’s talk metal versus plastic. Always choose metal. Plastic tips absorb polish over time, making your dots uneven. Metal stays consistent wash after wash. The best ones are made from stainless steel with a perfectly smooth finish.
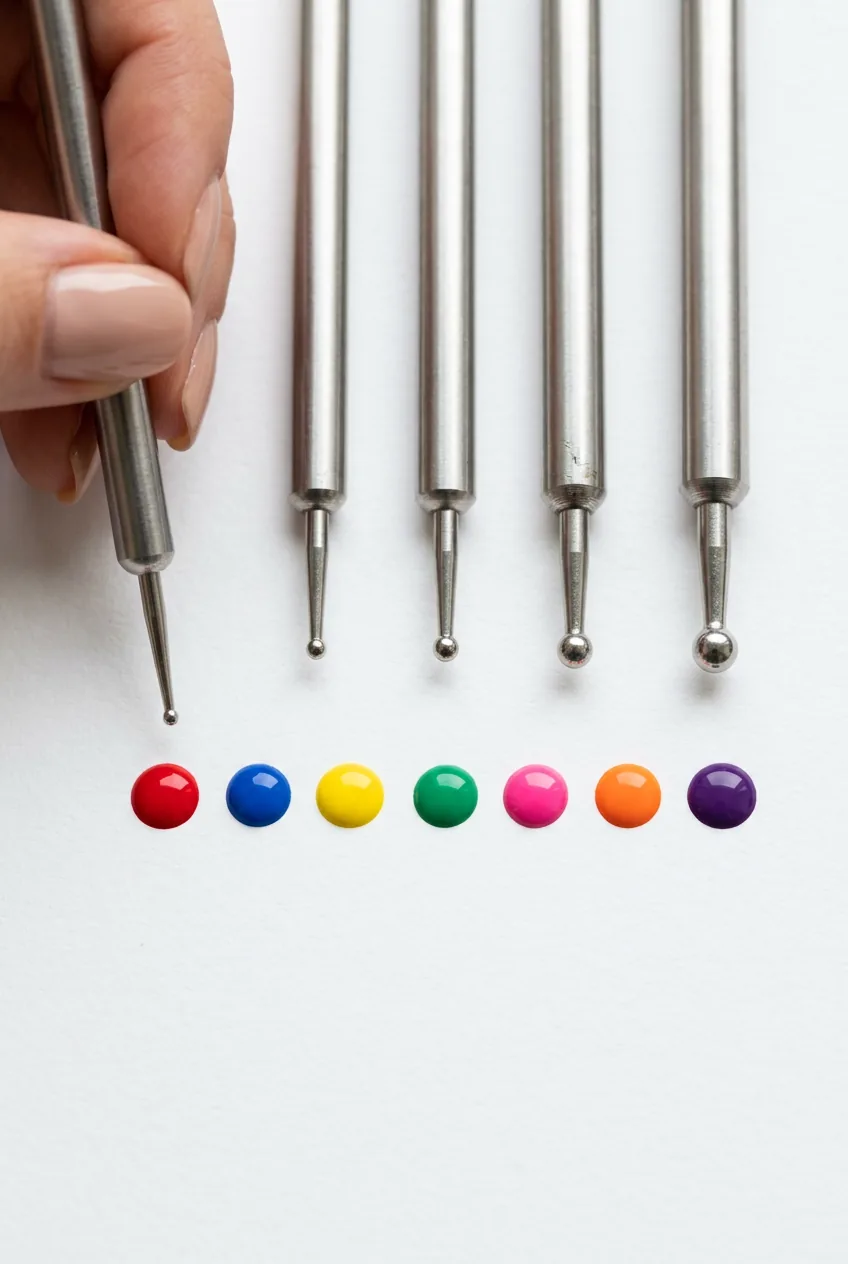
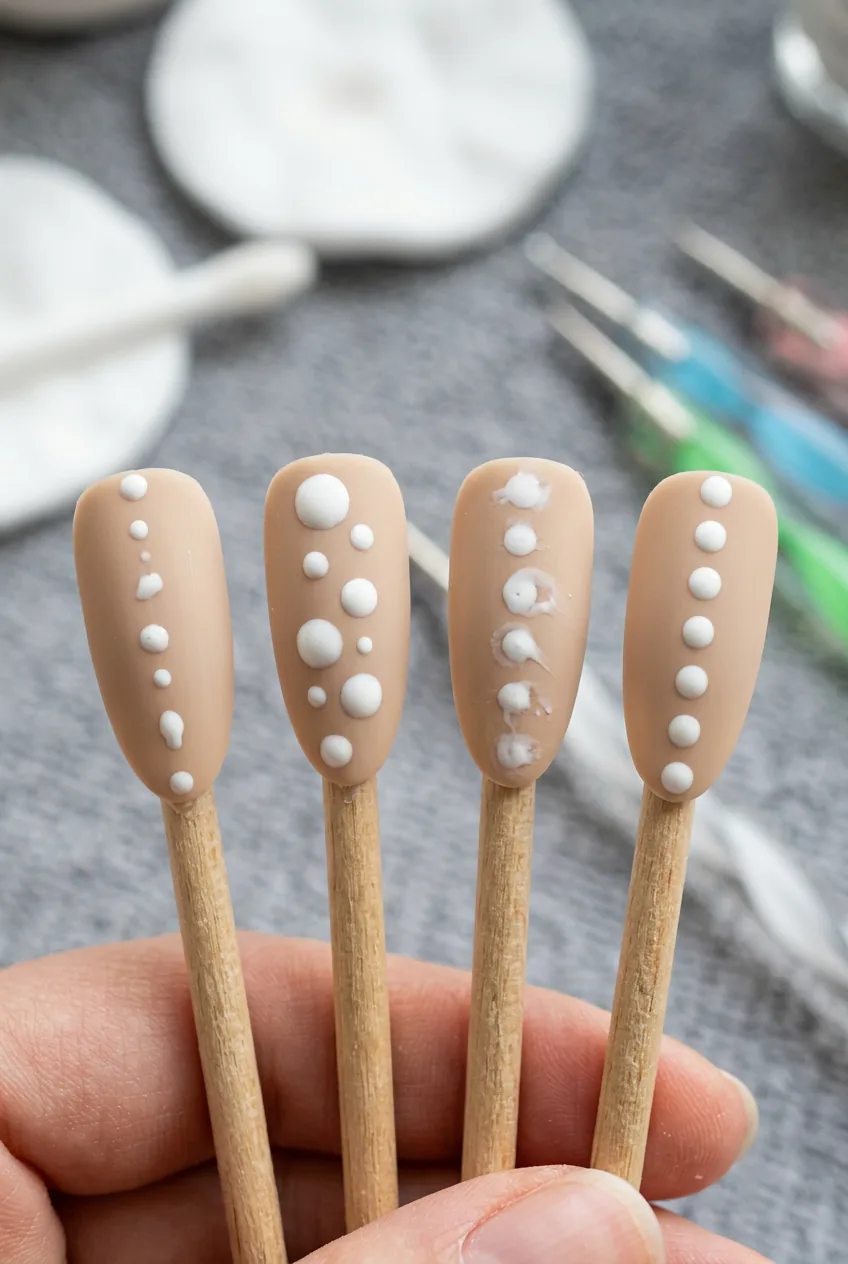
Size variety matters more than you think. I keep five different sizes in rotation:
- Extra small (0.5mm) — For tiny accent dots and filling negative space
- Small (1mm) — My go-to for classic polka dots
- Medium (2mm) — Perfect for statement dots on accent nails
- Large (3mm) — Creates bold focal points
- Extra large (4mm+) — For dramatic single dots or as a base for layering
Handle length is underrated but crucial. Short handles (under 4 inches) give you more control for detailed work. Longer handles are better for broad, sweeping patterns. I prefer the medium 5-inch length for most designs.
One tool I wish I’d discovered sooner? Double-ended dotting tools. Having two different sizes on one handle cuts down on juggling multiple tools during complex designs. The professional sets usually include these.
How the Technique Works on the Nail
The actual technique is deceptively simple, but the details make all the difference.
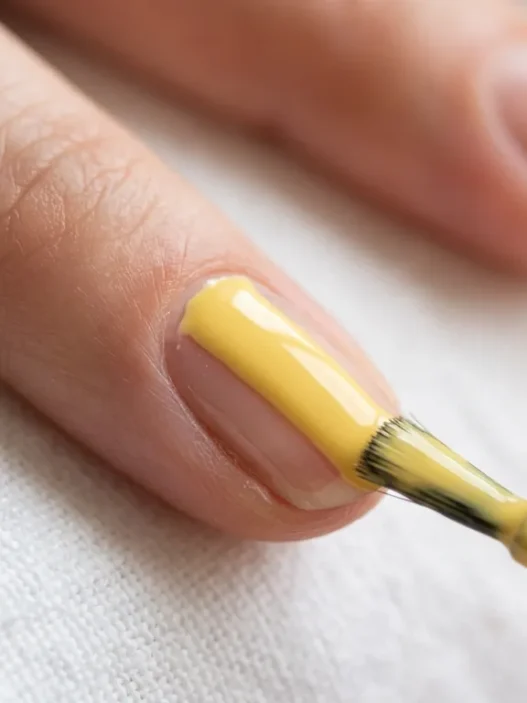
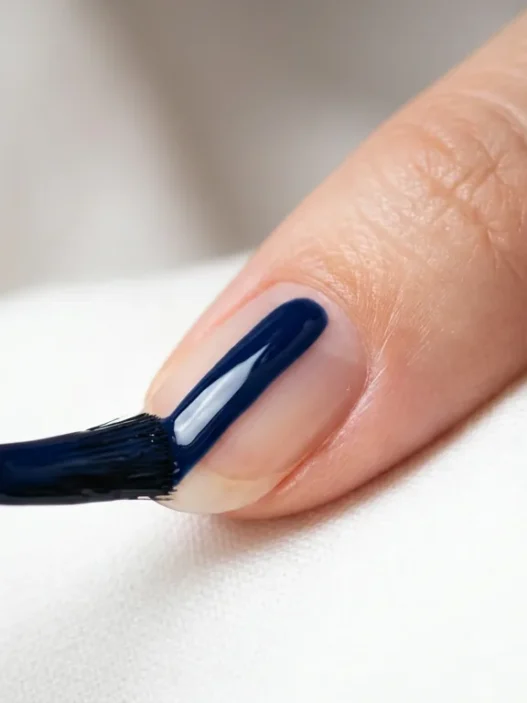
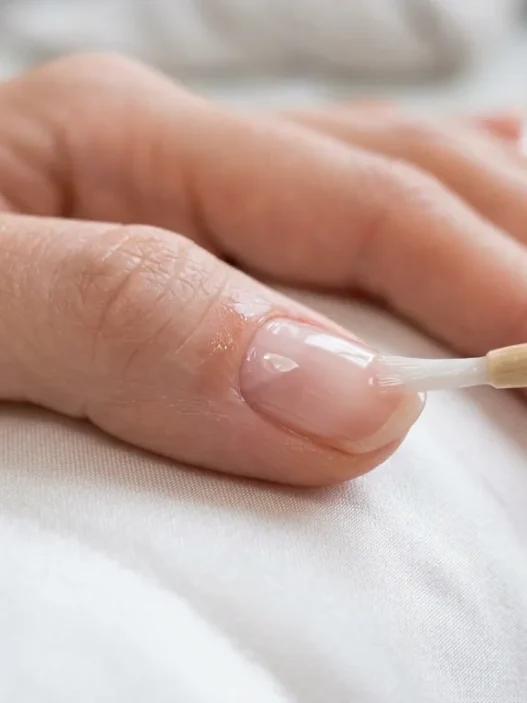
Start with your base coat completely dry. I cannot stress this enough — any tackiness will cause the dotting tool to drag and create smears instead of clean circles. Wait the full cure time, even if it feels dry to touch.
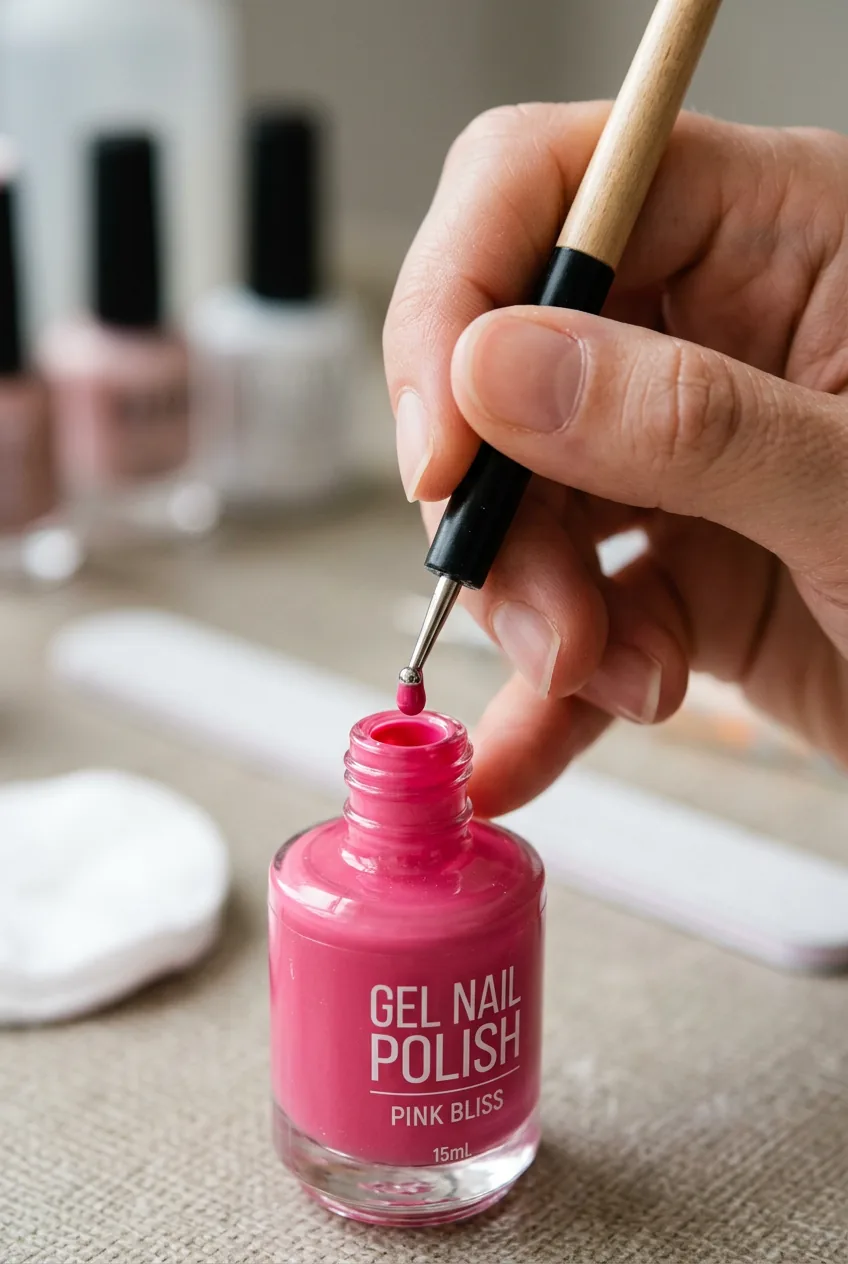
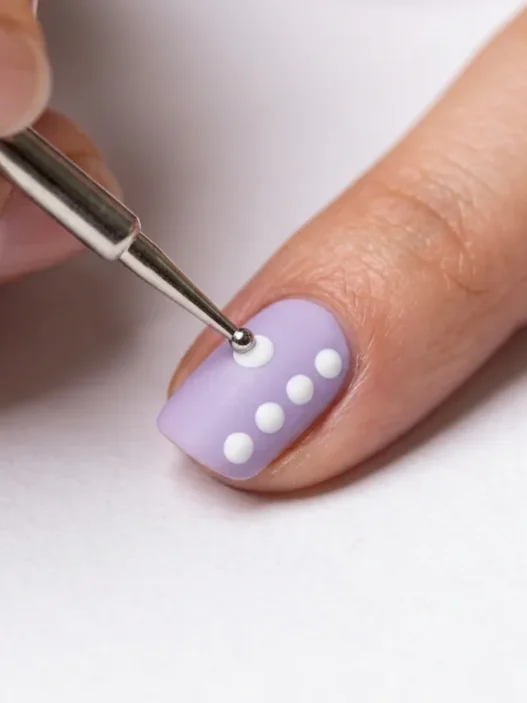
Loading the tool correctly separates beginners from pros. Dip straight down into your polish bottle, about 2mm deep for small dots, 3-4mm for larger ones. Don’t swirl or scrape against the sides — you want a clean reservoir of polish on the tip.
The approach angle matters. Hold the tool perpendicular to the nail surface. A 90-degree angle creates the most symmetrical dots. Any tilt will give you ovals instead of circles.
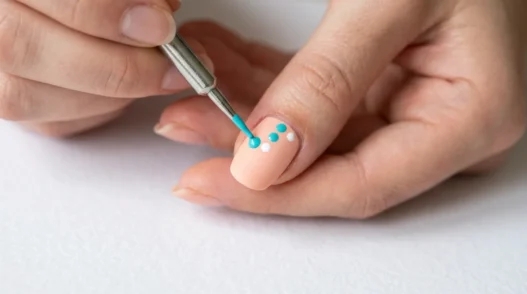
Press down with steady, even pressure. Think of it like stamping rather than painting. The motion should be straight down, pause for about half a second, then straight up. No twisting, no dragging.
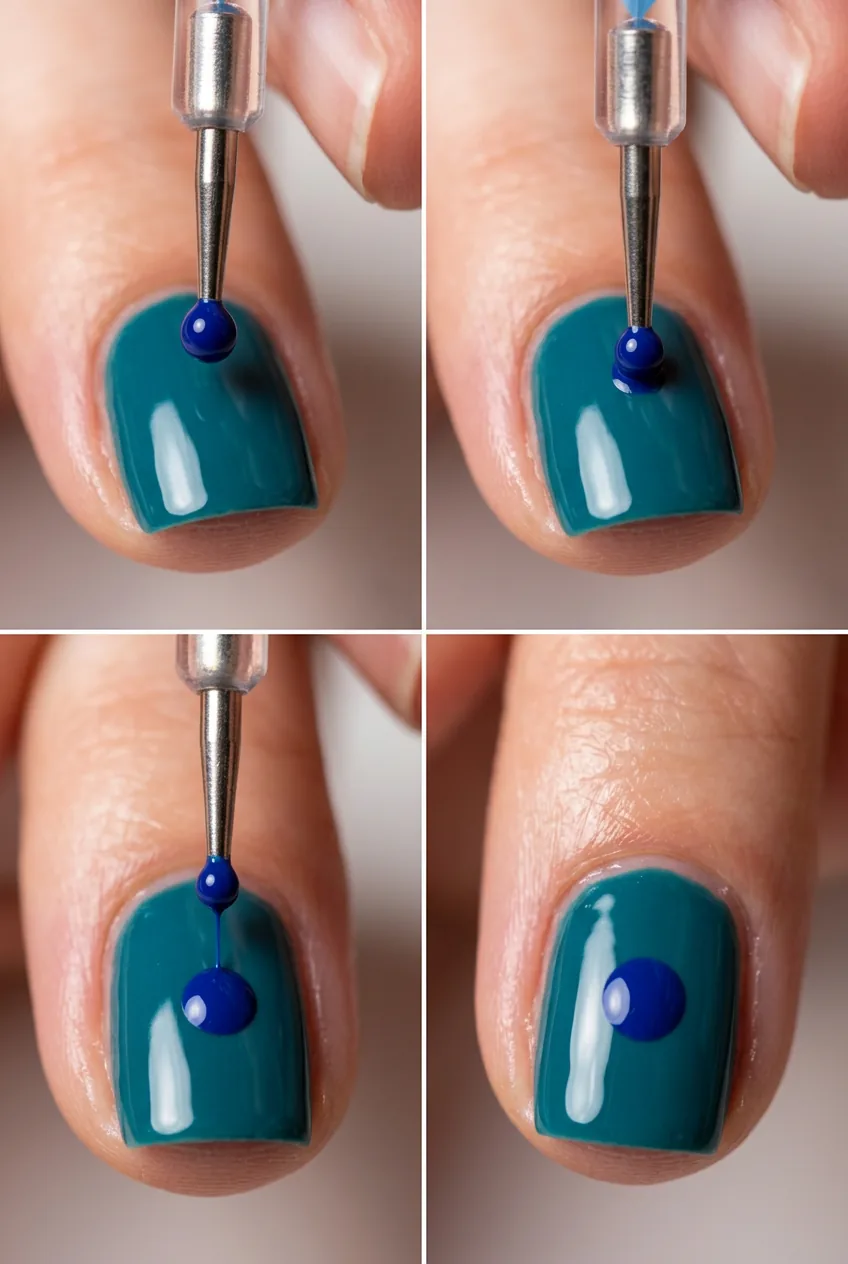
Timing between dots is critical. Work quickly enough that each dot is still slightly wet when you place the next one — this prevents visible overlap lines if you’re creating patterns where dots touch. But not so quickly that you smudge. It’s a rhythm you develop with practice.
For spacing, I use the “dot width” rule. The distance between dot centers should equal the diameter of your dots for balanced patterns. Closer spacing feels crowded, wider spacing looks sparse.
Watch the Pressure Technique in Action
The Common Pitfalls
Every dotting mistake I’ve made (and trust me, I’ve made them all) falls into predictable categories.
I once spent two hours creating an elaborate dot mandala, only to realize I’d been using polish that was too thick. Every single dot had a raised, bumpy center instead of lying flat. I had to remove the entire design and start over with properly thinned polish.
Polish consistency is the number one culprit behind failed dot designs. Too thick, and your dots will be raised and uneven. Too thin, and they’ll spread beyond your intended size. The sweet spot is fresh polish or polish thinned with 1-2 drops of thinner.
Temperature affects everything. Cold polish flows differently than room temperature polish. If your bottles have been in a cold room, let them warm up for 30 minutes before dotting. I learned this the hard way during a winter manicure session when half my dots came out oblong.
Tool maintenance is another common oversight. Clean your dotting tool after every 3-4 dots, not at the end of the design. Dried polish buildup changes the tip’s shape and makes subsequent dots irregular. I keep a small cup of acetone and cotton swabs right next to my workspace.
Pressure inconsistency ruins more designs than anything else. Your first dot might be perfect, but as you get into the rhythm, you unconsciously change how hard you press. Practice on a practice wheel first to develop muscle memory.
Base coat interaction is subtle but important. Some base coats stay slightly tacky longer than others. If your dots seem to “sink” into the nail or lose their defined edges, switch to a different base coat formula.
Once You’ve Got It, Where to Go Next
Mastering basic dots opens up a whole world of advanced techniques that most people don’t even know exist.
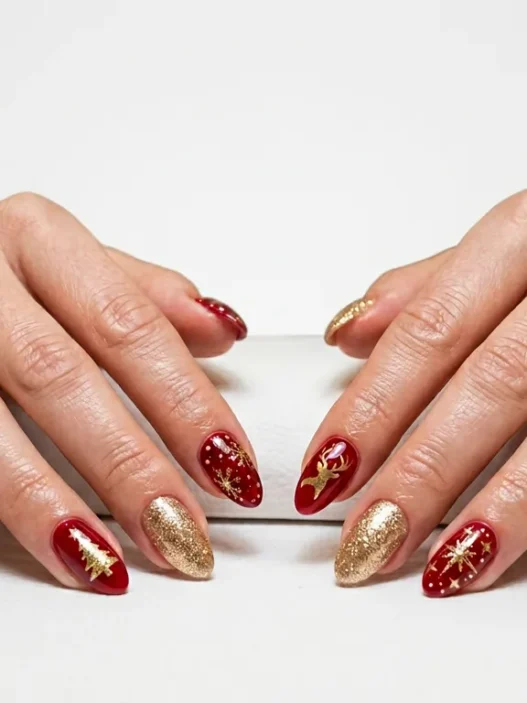
Layered dotting creates incredible depth. Place your first row of dots in a base color, let them dry completely, then add smaller dots in contrasting colors on top. I love doing this with metallics over darks — it looks like scattered stars.
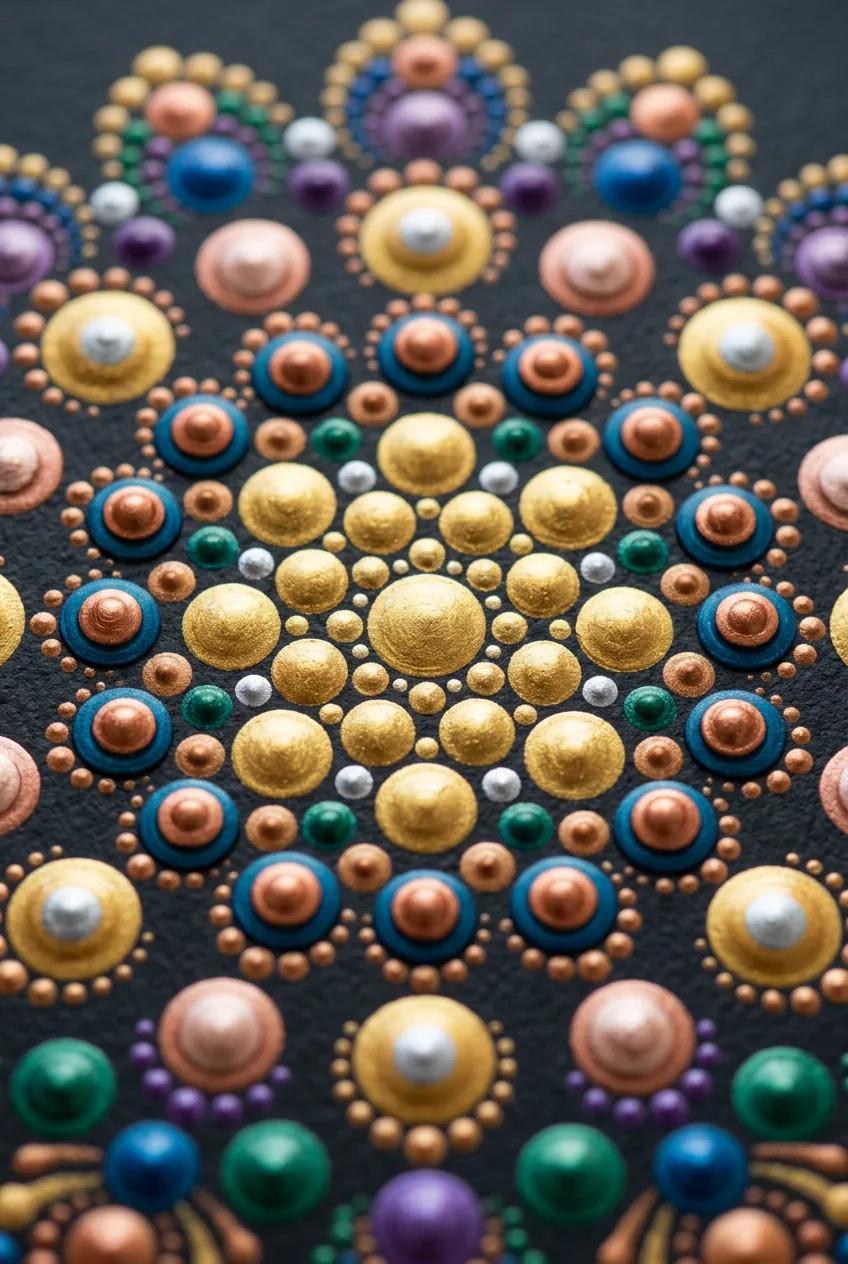
Gradient dotting uses the natural polish loading of your tool. Start with a fully loaded tool for your first dot (which will be the most opaque), then create subsequent dots without reloading. Each one will be slightly more translucent, creating a natural fade effect.
Textural dotting combines different polish finishes. Try matte dots over glossy base coats, or glossy dots over matte. The contrast is striking and adds sophistication to simple designs.
Color bleeding techniques push the boundaries further. Place dots of different colors while both are still wet, then use a clean tool to drag slightly between them. You get gorgeous color mixing effects that look hand-painted.
For complex patterns, I recommend studying traditional textile designs. Paisley, mandala, and geometric patterns all translate beautifully to dot work. The key is planning your dot placement on paper first.
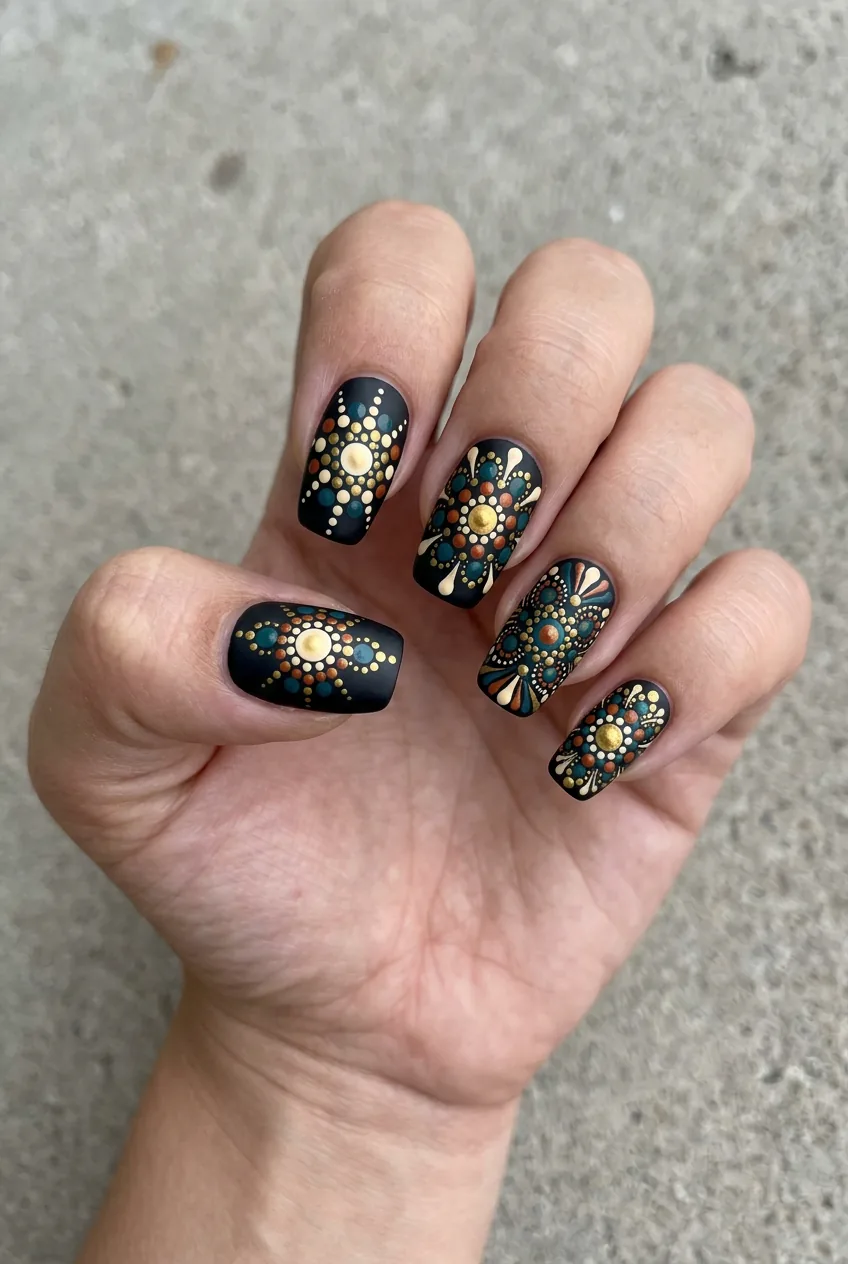
Integration with other nail art designs elevates everything. Dots make perfect accents for free-hand nail art — they can be flowers centers, pattern fills, or transition elements between different design sections.
Advanced practitioners use dotting tools for non-dot applications too. The rounded tip is perfect for creating small hearts (by placing two dots close together and dragging downward), flower petals (elongated dots), and even tiny letters for nail art typography.
Video tutorials can show you techniques that are hard to describe in words, especially the pressure variations that create different effects.
Quick Answers About Dotting
Do I need special polish for dotting?
No special polish required, but consistency matters. Regular polish works perfectly if it’s the right thickness — not too gloopy, not too thin. I actually prefer standard polish over gel for dotting because it’s more forgiving with timing.
How long do dotted manicures last?
Just as long as any other nail art, usually 5-7 days with regular polish and up to two weeks with gel. The dots themselves don’t chip any faster than solid color, but intricate patterns can show wear more obviously.
Can I fix a wobbly dot after I place it?
Only if you catch it immediately while the polish is still wet. Use a clean dotting tool to gently reshape the edges, or wipe it off completely with a cotton swab dipped in acetone and start over. Don’t try to fix dried dots — you’ll make it worse.
What’s the biggest dot size that still looks elegant?
This depends on your nail length and the overall design. On short nails, anything over 3mm can look overwhelming. On long nails, you can go up to 5mm for statement dots. The key is proportion — your largest dots shouldn’t take up more than a quarter of your nail width.
Six months into my dotting journey, I can create designs that look like they took hours but actually only need about 15 minutes. There’s something deeply satisfying about the precision this technique offers — each dot is exactly where you intend it to be, exactly the size you want. It’s meditative in a way that freehand painting never quite achieves for me.