


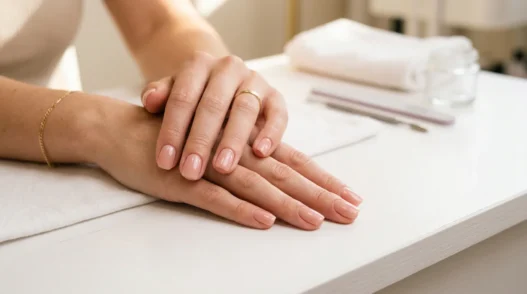

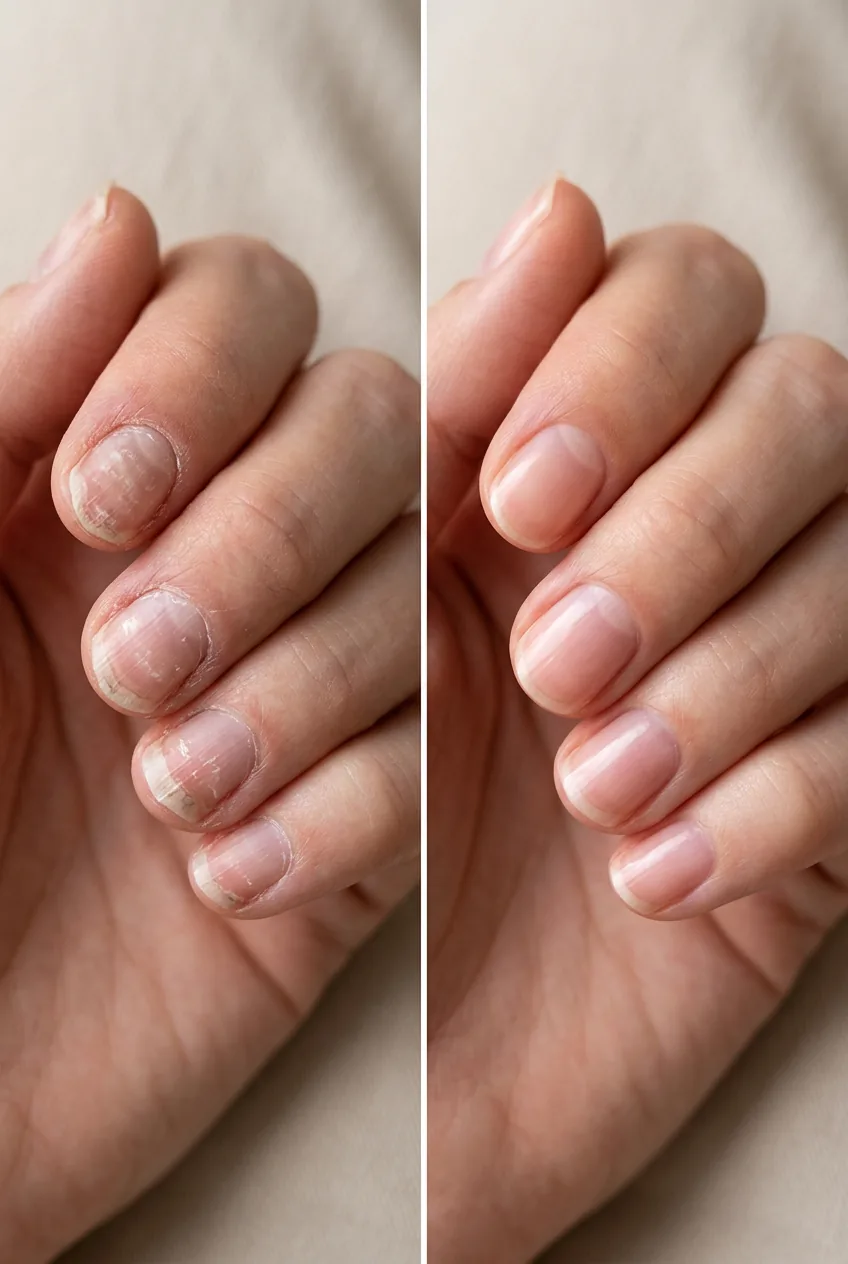
I used to think my at-home manicures looked decent until I watched my nail tech work. There was something different about her process — each movement deliberate, methodical. My nails lasted three weeks without chipping while my DIY attempts barely made it past day five.
After months of observation (and probably annoying her with questions), I finally cracked the code. It’s not about expensive polish or fancy tools — it’s about following the same systematic approach that salons use to guarantee consistent results.
The Pro Technique Breakdown
What You’ll Need
Here’s the thing — you probably already own most of this stuff. I’m not about to send you on a shopping spree for tools you’ll use once.
- Cuticle pusher (metal or orange stick)
- Nail file (180/240 grit works perfectly)
- Rubbing alcohol or nail dehydrator
- Base coat (any decent brand)
- Your chosen polish color
- Top coat
- Small cleanup brush
- Acetone for cleanup
The real secret isn’t in fancy equipment. It’s in the order you use these basic tools. Most people skip steps or do them backwards, which is why home manicures fail so quickly.
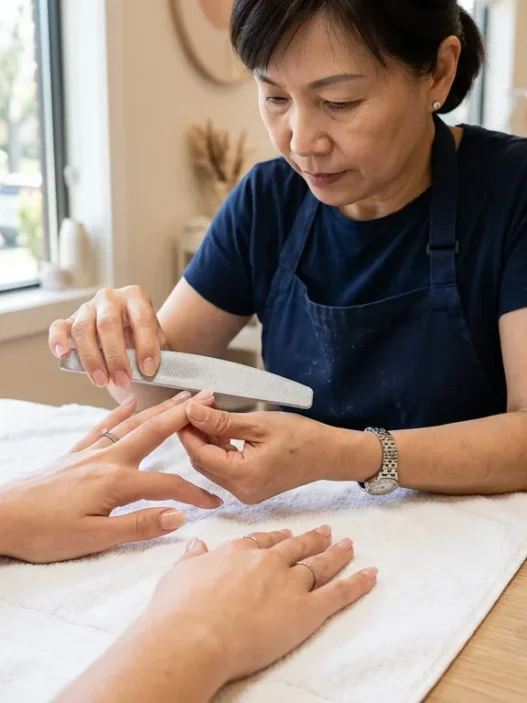
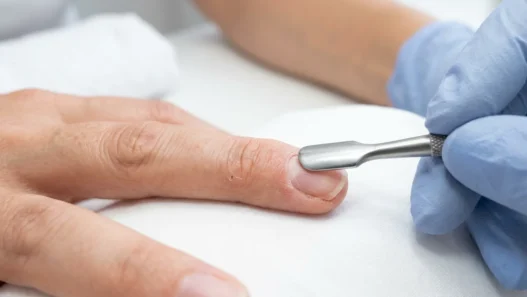
Step 1: The One Move Nail Techs Never Skip
Every salon starts with this, but I guarantee you don’t do it at home. They push back your cuticles before shaping the nails. Not after. Before.
This isn’t about making your cuticles look pretty (though they will). It’s about exposing the actual nail plate so you can see exactly what you’re working with. When cuticles are covering part of your nail, you can’t file the right shape or apply polish to the proper area.
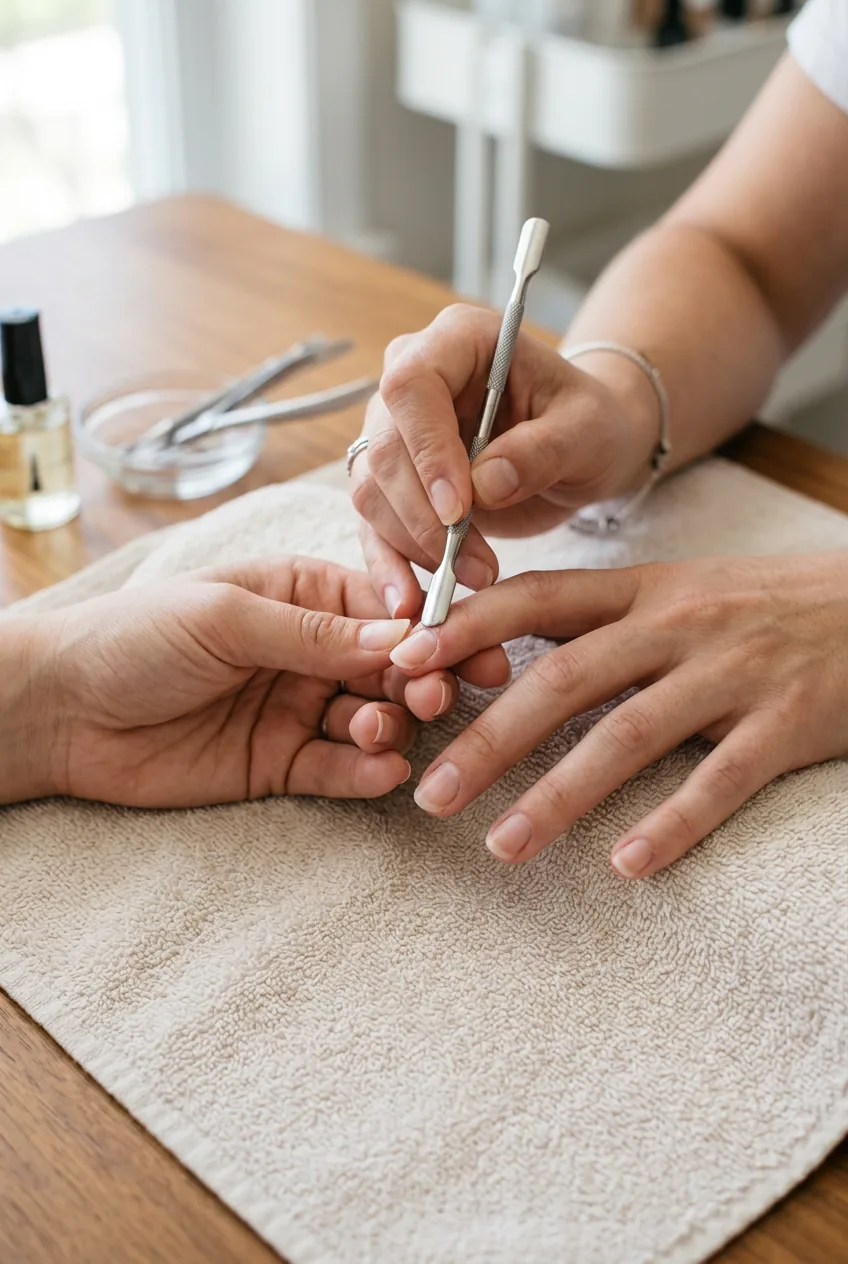
Use your cuticle pusher to gently nudge the cuticle back toward the base of your nail. Don’t dig or force it — just apply steady, gentle pressure. You’ll immediately see more nail surface than you realized was there.
This is why salon manicures look so much more polished than home ones. They’re working with the full nail plate, not just the visible portion.
Step 2: Why Salons Do This First
Now comes the shaping, but here’s where most people mess up. Salons always file in one direction. Always. No back-and-forth sawing motion that creates micro-tears in the nail plate.
Start from the outside corner of your nail and file toward the center. Lift the file, go back to the outside edge, file toward center again. Do this on both sides until you achieve your desired shape.
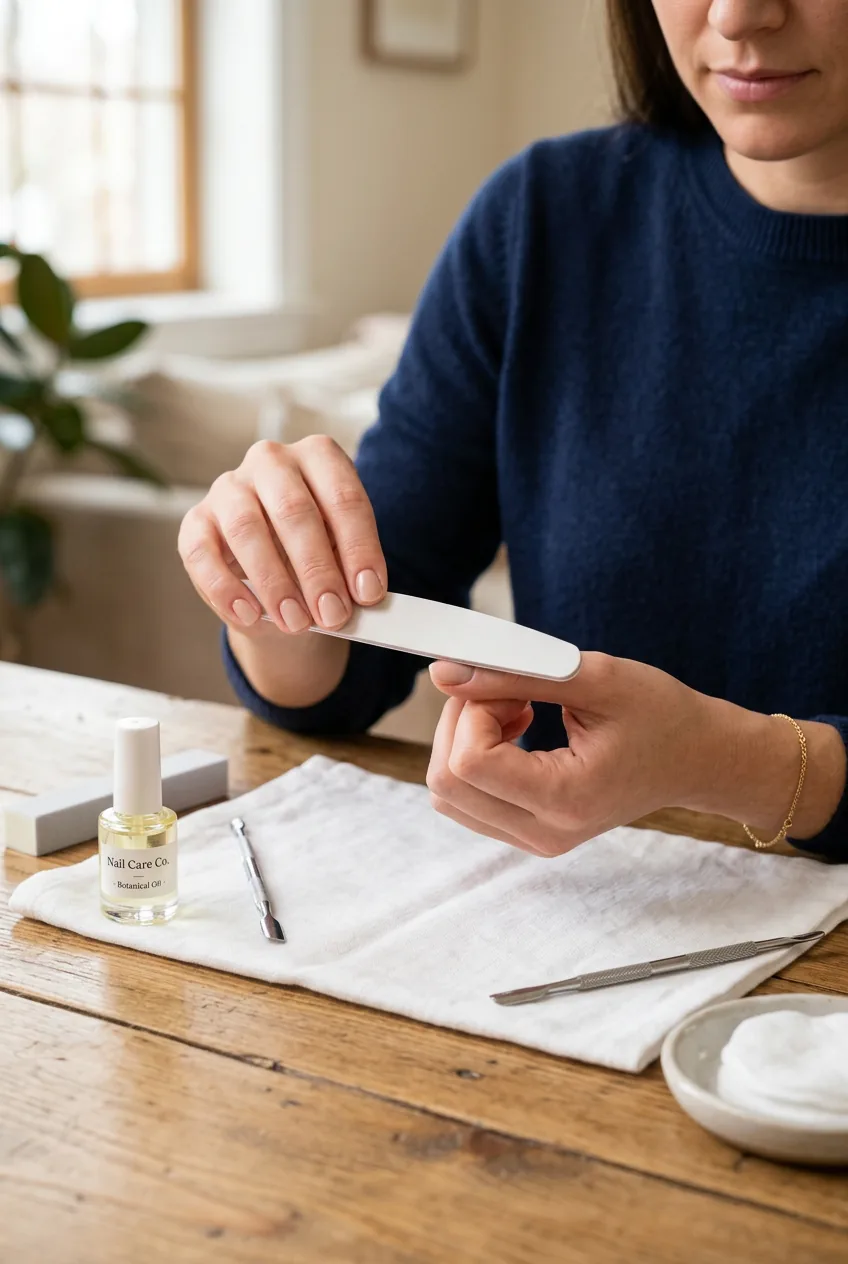
I used to file back and forth like I was sawing wood. No wonder my nails kept splitting and peeling at the edges. Once I switched to the one-direction method, my nail health improved dramatically within two weeks.
The angle matters too. Hold your file at a 45-degree angle under the nail, not straight up and down. This creates a slight bevel that prevents snagging on clothes and hair.
File slowly. Rushing this step ruins everything that comes after. Your nail shape is the foundation of the entire manicure.
Step 3: The Foundation That Changes Everything
This is the step that separates amateur hour from professional results: proper nail dehydration. Salons use nail dehydrators, but rubbing alcohol works just as well at home.
Swipe each nail with rubbing alcohol on a cotton pad. This removes any oils, moisture, or residue that could prevent your base coat from adhering properly. Skip this step and you’re basically painting over a barrier.
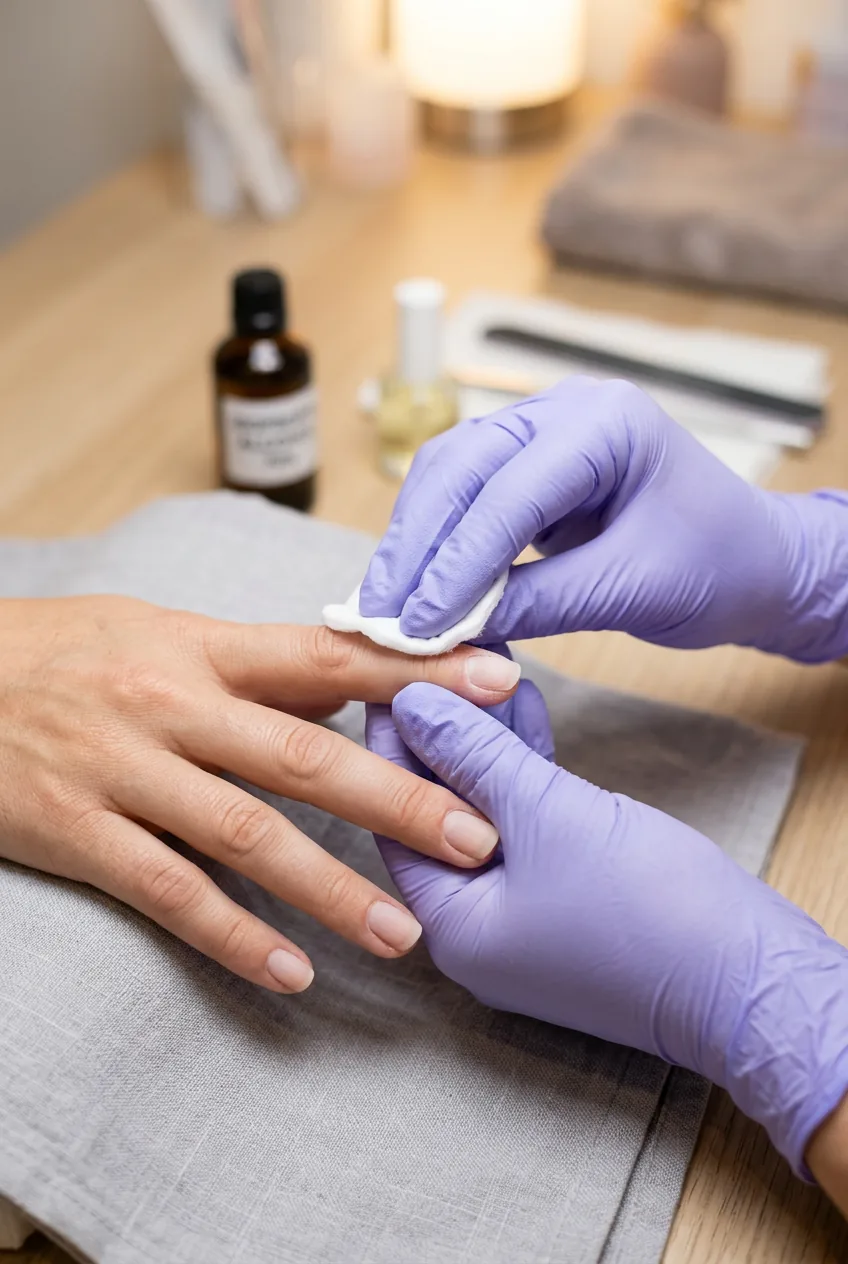
Let your nails air dry for about 30 seconds after the alcohol treatment. They should feel completely dry and slightly matte — that’s exactly what you want. The nail plate should have zero shine or slickness to it.
Professional nail training emphasizes this dehydration step because it’s where most home manicures fail. You can use the best polish in the world, but if it’s not bonding to a clean, dry surface, it’ll chip within days.
Step 4: How to Replicate the Pro Base
Base coat application is where I see the biggest difference between salon work and home attempts. Most people slap it on like house paint. Salons treat it like the foundation it actually is.
Apply base coat in thin, even strokes. Start with a stripe down the center of your nail, then fill in each side with overlapping strokes. The goal is complete coverage without pooling or thick spots.
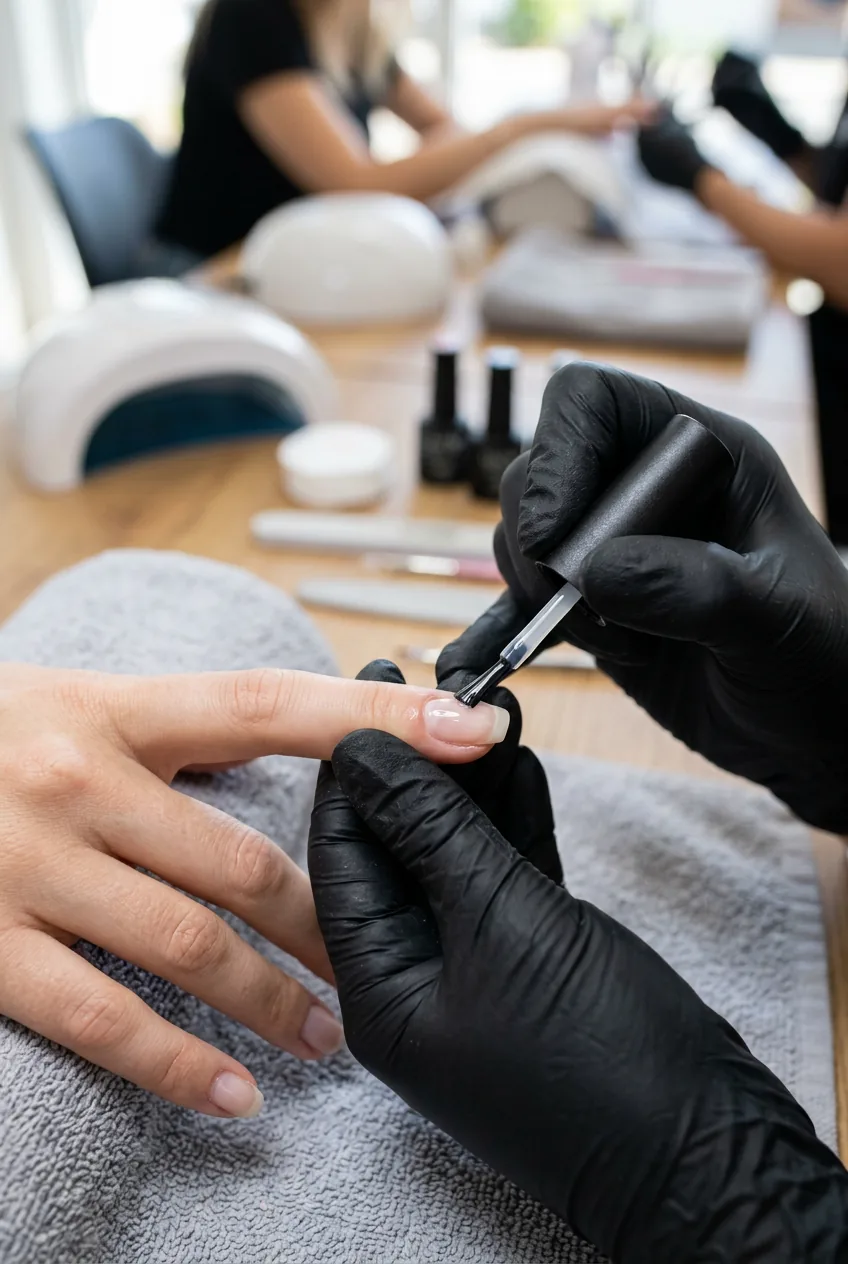
Here’s the part nobody talks about: cap the free edge. Run your brush along the tip of your nail to seal the edge. This prevents water from seeping under your polish and causing premature lifting.
Let the base coat dry completely before moving on. I know it’s tempting to rush, but tacky base coat will drag when you apply color, creating streaks and bubbles.
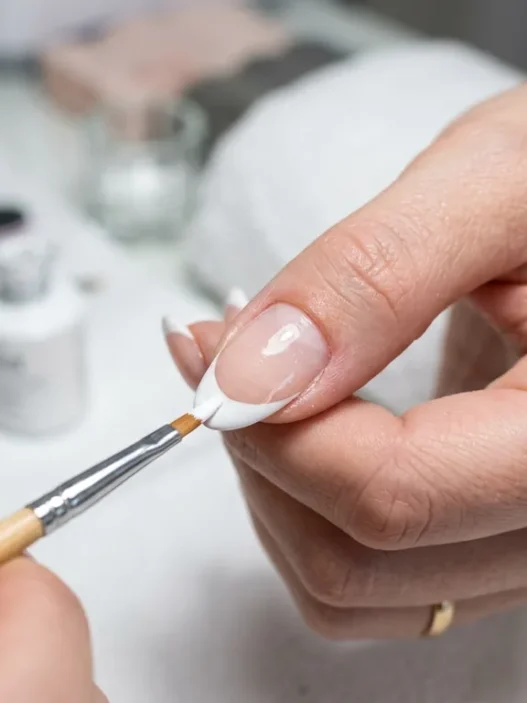
Step 5: The Three-Stroke Method
This is the technique that made everything click for me. Professional nail techs use a specific three-stroke method for color application that ensures even coverage and professional-looking results.
First stroke: Down the center of your nail from cuticle to tip. Don’t worry about perfect coverage yet — this is just laying the foundation.
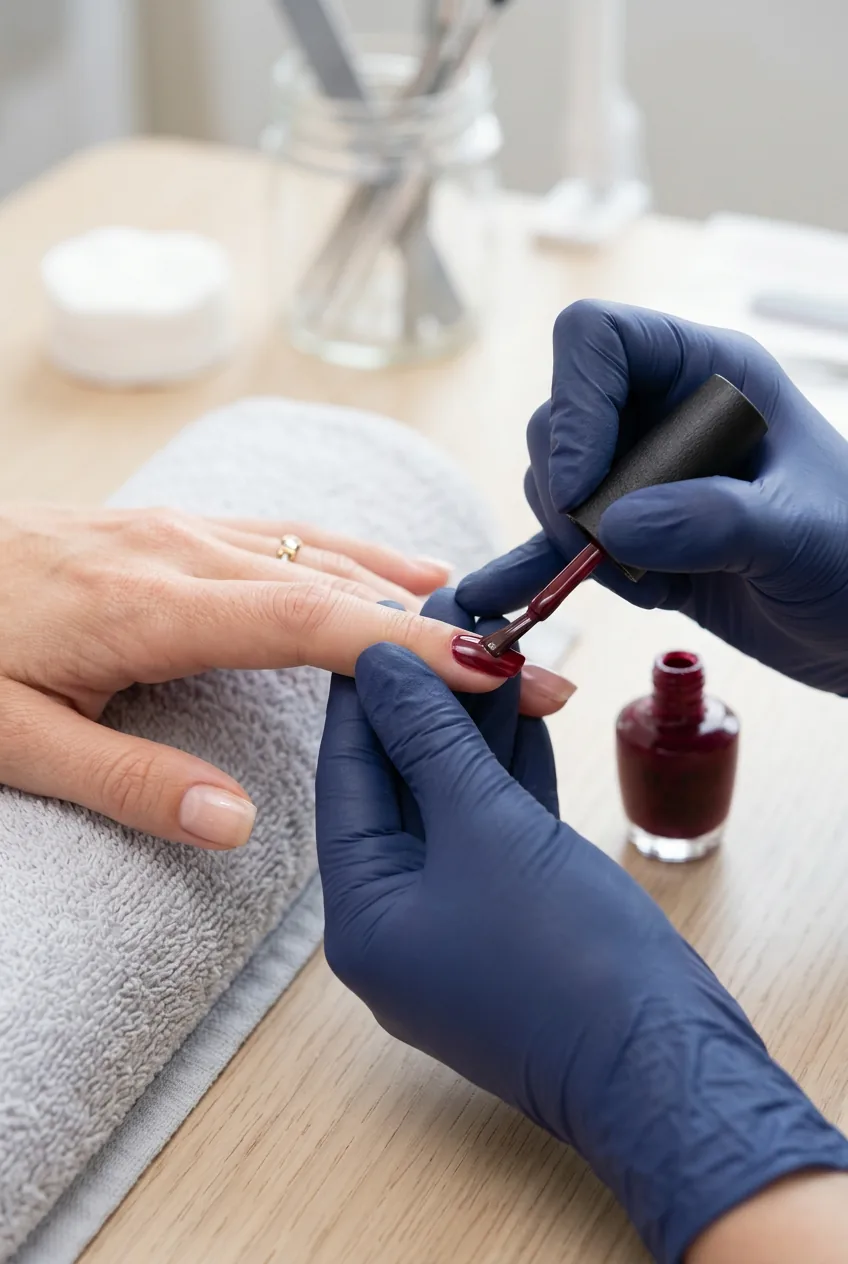
Second stroke: Fill in the left side of your nail, slightly overlapping the center stroke. Third stroke: Fill in the right side, again with a slight overlap.
The magic happens in those overlaps. They blend the color seamlessly and eliminate the streaky appearance that screams “home manicure.” Each stroke should flow smoothly without lifting the brush mid-nail.
Apply two thin coats using this method rather than one thick coat. Thin coats dry faster, look smoother, and last longer. I learned this from watching my freehand painting attempts — the same principles apply to solid color application.
See the Three-Stroke Method in Action
Step 6: The Capping Technique Nobody Talks About
Remember how we capped the free edge with base coat? We’re doing it again with color, and again with top coat. This sealing technique is probably the biggest difference between salon manicures and home ones.
After applying your color with the three-stroke method, run the brush along the tip of your nail. You’re creating a protective seal that prevents chipping from everyday activities like typing, opening cans, or digging through your purse.
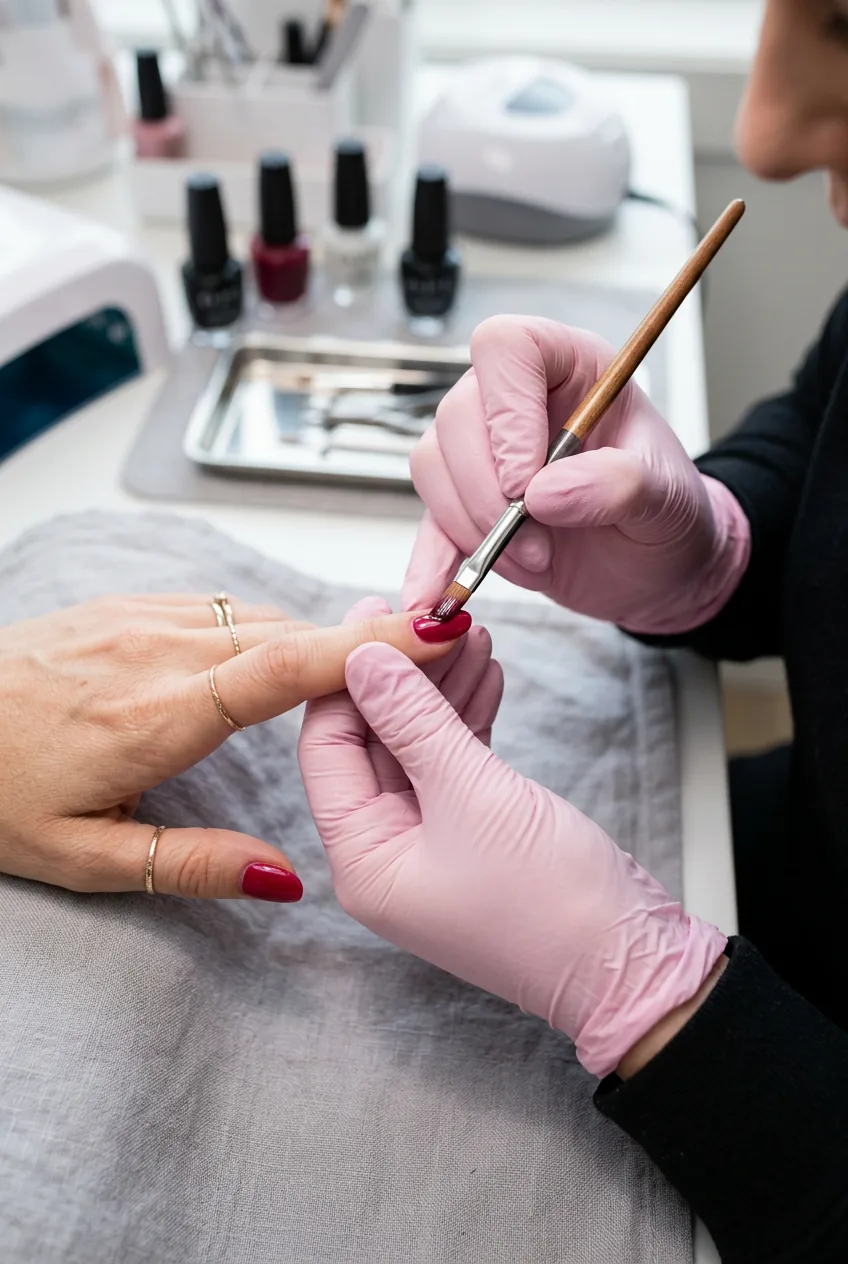
Most people skip this because they think it’ll create buildup or look obvious. Done correctly, it’s virtually invisible but extends your manicure’s life by days or even weeks.
The key is using just the very tip of your brush with minimal product. You’re not painting a thick line across your nail tip — you’re creating a microscopic seal.
This technique works especially well if you’re into strengthening treatments since it helps protect any repair work you’ve done.
Step 7: When This Technique Doesn’t Work
Let’s be real — this method isn’t magic. There are situations where even perfect technique won’t give you salon results at home.
If your nails are severely damaged, ridged, or have deep scratches, no amount of proper application will create a smooth finish. You need to address the underlying nail health first with repair treatments before expecting flawless results.
Similarly, if you’re using old, thick, or separated polish, this technique won’t compensate for poor product quality. I learned this the hard way when trying to salvage a bottle of polish that had been sitting in my bathroom drawer for two years.
Environmental factors matter too. Applying polish in humid conditions, extreme temperatures, or dusty environments will affect your results no matter how perfect your technique.
The biggest limitation? Time and patience. This process takes about 45 minutes to an hour when done properly. If you’re rushing or trying to multitask, you’ll get rushed results.
But when conditions are right and you follow these steps exactly as salons do, the results are genuinely indistinguishable from professional work. My last at-home manicure using this technique lasted 18 days without a single chip — and I type for a living.
Questions I Always Get About This
Can I skip the dehydration step if I just washed my hands?
No, absolutely not. Even freshly washed hands have natural oils that return within minutes. The alcohol dehydration removes oils that soap can’t touch, plus it ensures your nail plate is completely moisture-free for optimal adhesion.
How long should I wait between coats?
Each coat should be completely dry to the touch before applying the next. For base coat, about 2-3 minutes. For color coats, 3-5 minutes each. Top coat can go on immediately after the final color coat is dry.
What if I mess up and get polish on my skin?
Don’t panic and don’t try to wipe it off immediately. Let everything dry completely first, then use a small cleanup brush dipped in acetone to remove the excess. Trying to fix wet mistakes usually makes them worse.
Does this work with gel polish too?
The basic principles apply, but gel polish has its own specific requirements for curing times and lamp exposure. The prep work and application technique remain the same, but you’ll need to follow your gel system’s instructions for curing between coats.
Following this exact sequence has transformed my relationship with at-home manicures. What used to be a frustrating exercise in futility now gives me results that rival my favorite salon. The key is treating each step with the same respect that professionals do — because that’s exactly what separates good manicures from great ones.